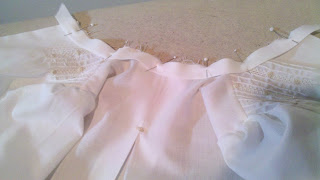
I smocked this dress before our move in September for a friend's then unborn baby girl. Then the big move and settling in and lastly setting up my sewing room. (I will post pics of it in an upcoming blog post.) I finally finished the machine work and now to mail it. The baby girl was born in October. So I better hurry and get it to her. As fast as babies grow, she wont have long to wear it. Notice the deep hem, though. That does allow for a little growing room. What a joy it is to sew for little ones!!
I love how sweet these little puffed sleeves look with a touch of smocking to act as elastic. I just picture a precious little arm in there.
I did a simple geometric design around the bishop style neckline. For a newborn, it only takes a few rows of smocking to make the gown or dress look special.
There is nothing more precious or classic as a little dress like this. Babies should be dressed "special" because they are "special". There will be plenty of time to dress them in the fashions of the day when they get older.
I have also been working on baby gifts that I have received orders for recently. I have done quite a bit of machine embroidery and I'm posting the day gown I just completed. These projects are giving me practice to hopefully make items for my own grandchildren one day. As fun as it is to make things for babies that I may never meet, I can't even imagine the JOY of sewing something for my own grandchild. OK, enough of that!!!
I made this baby daygown over the weekend and mailed it yesterday. It isn't my best work but once it was finished, I thought it looked nice. I will "try a little harder to do a little better" next time. I love pin tucks and have only made them a couple of times. You experts out there, please don't cringe at the above picture. They pressed out pretty well.
After several unsuccessful attempts to hand embroider a feather stitch between the pin tucks, I added a feather stitch from the decorative stitches on my sewing machine and hand embroidered bullion roses on the machine feather stitch. I rarely use those "fancy" stitches on my machine, so it was a treat to use this stitch and have it be appropriate.
Of course, this was an extra touch that I added just because I wanted to smock. It was not part of the order, just a little a gift from me. This is a long sleeved day gown and this will look so sweet around that little baby wrist!
Here's another look at the back with the little rose bud and how a neck band looks before I sewed in on. Once I sew it by machine, I fold it over and stitch it down by hand.
You can see the inside of the neck band that I've secured by hand stitching and added french lace that I "tea stained" an ecru color. I used a simple whip stitch to attach the lace to the edge of the tiny neck band. Not pictured are the french seams that I used for this dress. I will show that in another post one day. I usually use french seams on all my baby and children's clothes. I love this technique and it makes a garment even more special and look like a true heirloom.
I have had a hard time finding the little buttons I want for my baby clothes. So, for this project I decided to use bullion roses instead and use snaps to fasten the dress closed. It may prove to be more functional for mom and dad, too. Those baby's do tend to wiggle and fastening buttons can sometimes be a challange. So it is probably a good idea to use snaps anyway. Come to think of it, it may be a blessing in diguise not to have those little buttons afterall.
I made a casing at the bottom of the gown and used button holes for the ribbon to enter and exit through. The dress overlaps right over left, therefore, if I just ran the ribbon through the casing without a way to overlap the two sides, it would not look as nice at the bottom or close completely.
I have a couple of other projects to post tomorrow. I realize got a little lengthy with this one. I think the key to balance is moderation. Maybe they are the same and I just made a "duh" statement. I tend to go full throttle then burn out. So from here on, I will "try a little harder, to do a little better" and pace myself.


